Outlook Add-in
Calven's Outlook Add-in allows you to see colleagues' plans, book meeting rooms, register visitors, and request services, all within their Microsoft Outlook experience.
How do I install the Outlook Add-in?
To install the Calven Add-in:
-
Navigate to the Microsoft Marketplace from within Outlook
-
Search for Apps menu and search for “Calven for Outlook”
-
Download the Add-in

To use the Calven Add-in for Outlook
-
Open the Outlook calendar
-
Create a new appointment and invite people from your company who use Calven
-
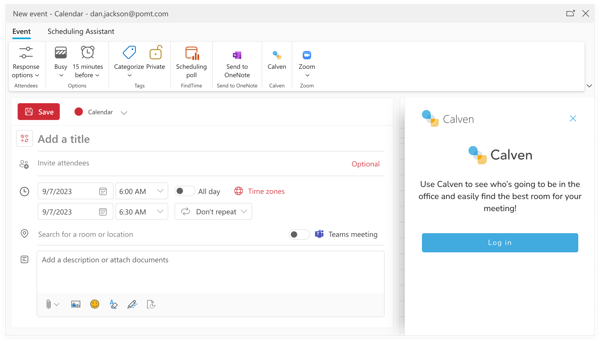
Select “Calven” from the toolbar. It may be hidden behind a collapsed “…” section
-
A Calven sidebar will open. Select “Login” and log into Calven using your Calven account

To do an enterprise installation and push the add-in to more users automatically, see this guide here: Deploy add-ins in the admin center - Microsoft 365 admin
Note that users will still need to login to the Add-in when using it for the first time.
Additional information from Microsoft regarding delegate/shared calendars and Outlook versions:
- Office add-ins aren't available from a shared calendar
- Getting started with the new Outlook for Windows
Using the Calven Outlook Add-in to see upcoming plans for colleagues and book rooms

-
Create a new event in Outlook and add people (who also use Calven) to your meeting.
-
Click the Calven button from the row of buttons on top of the event to open the Calven Add-in.
- The Calven Add-in will open with a view to your home office. It will show how many of your invitees are planning on being in that office the day of the meeting, and appropriate meeting rooms for your meeting.
- When you adjust which days you want to book the meeting, the meeting room availability and user plans will update in the Calven add-in.
- To see details on where each meeting participant is planned to be on the day of the meeting, click on the link. Each meeting participant will be shown here with their planned location for the day of the meeting. By shifting the time for the meeting, you may find a better outcome for invitees being in Office.
- The appropriate meeting rooms for your meeting are shown in a list. By default, the meeting rooms are filtered to show rooms that have a capacity at least as large as the number of meeting participants that are in that office that day. To adjust the value of the filter, select the number to change it.
- You can filter the rooms further by selecting specific room amenities that are required for the meeting.
- Check any room to add it to your meeting invite.
- Click the Send button to send your event, which will book your room as normal.
Note: If you don't see the Calven app in Outlook, then click on the three dots to find the Add-in. If it is also not there, check with your administrator to ensure the Calven Outlook Add-in is installed.
Using the Calven Outlook Add-in to invite visitors
When you press the '+ Add ons' button, you'll see the option to pre-register a visitor if your organization has visitor management configured. Clicking this button will show available visitor types in your selected office.
Using the Outlook Add-in to submit a service request
When you press the 'add ons' button, you'll see the option to submit a service request if your organization has service requests configured. Clicking this button will show available service requests in your selected office.

When a service request is selected, it will provide the form that must be filled out. In addition to the form questions, the following information will be provided with the service request:
-
Meeting title
-
Meeting date and time
-
Meeting location(s)
-
Number of attendees
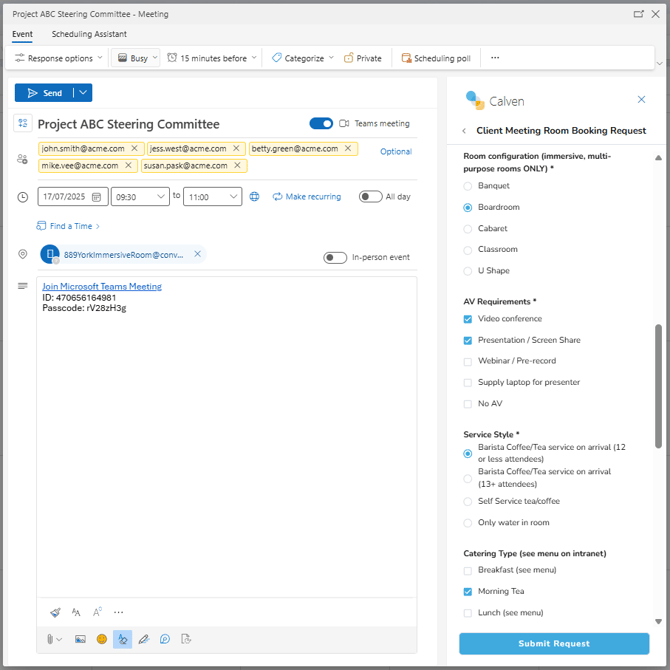

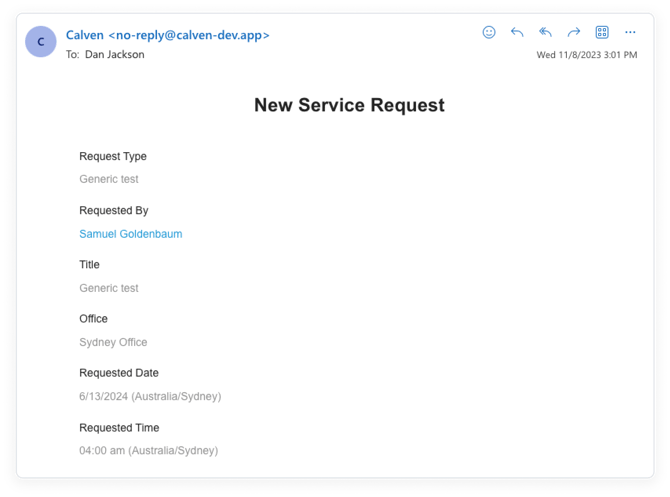
When an employee clicks ‘Submit request’ the request will appear in Backoffice and an email will be sent to the recipients for that office.
The email is a well-structured document that can be read by humans or ingested by ticketing & low code systems such as ServiceNow, Jira Service Desk, Microsoft Power Automate and more.
Service Request configuration for the Add-in
Global Administrators and Service Request Admins can see the Service Requests menu item in Backoffice. Clicking on Service Requests allows an administrator to configure request types and view requests.
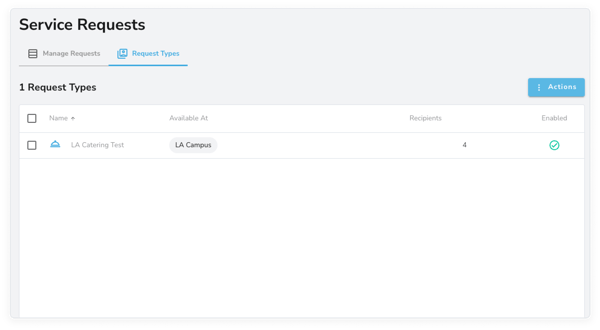

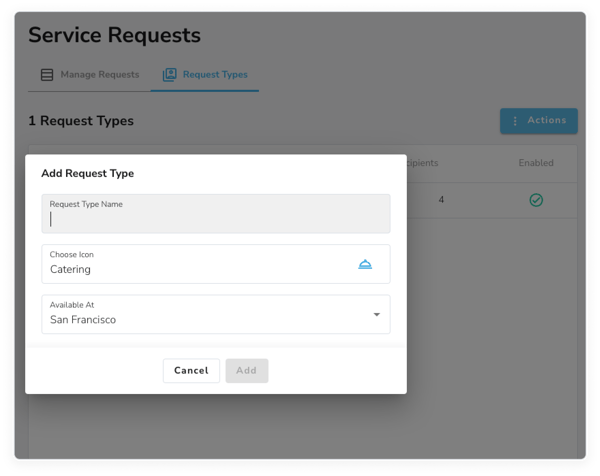
Click actions → Add Request Type to add a new service request form.
You will need to enter a name, select and icon, and at which locations the service will be available.

Once created, the administrator can configure the following other items related to the service request:
-
Notes, which will be published at the top of the request form for anyone submitting a request
-
Whether the requester should be on the email
-
Whether the service request is enabled so employees can view it.
-
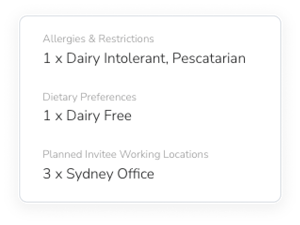
Whether two items should be included:
-
A summary of how many invitees of the event are working at what locations
-
A summary of the invitee allergies and restrictions
-
Note that those last 2 items are provided in an anonymized way in the email:

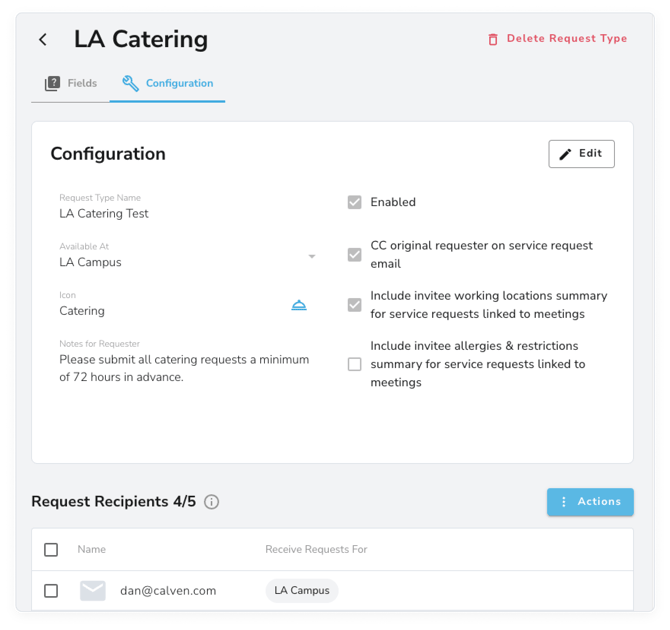

Recipients can be added who will receive an email summary of the service request when it is submitted. Those recipients can be either Calven users or generic email addresses.
Each recipient will specify which offices they will receive service request submissions for.
Configuring the questions
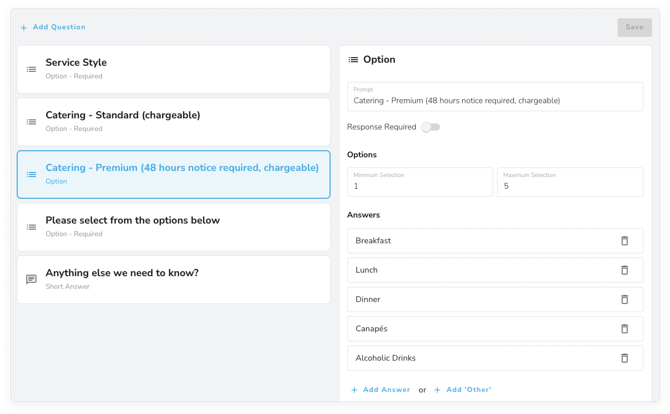
Once the service request has been configured, the questions in the form can be added.
There are two question types: short answer and options. The questions can be required or optional.

Requests to spreadsheet
Microsoft Power Automate connectors will convert the content in email to a spreadsheet. Contact support@calven.com for assistance.
